The complete list

SmileCrop features

What SmileCrop does, feature by feature: automatic cropping, QR name tags, quality control, manual editing, automation and data safety.

Contents

Automatic cropping

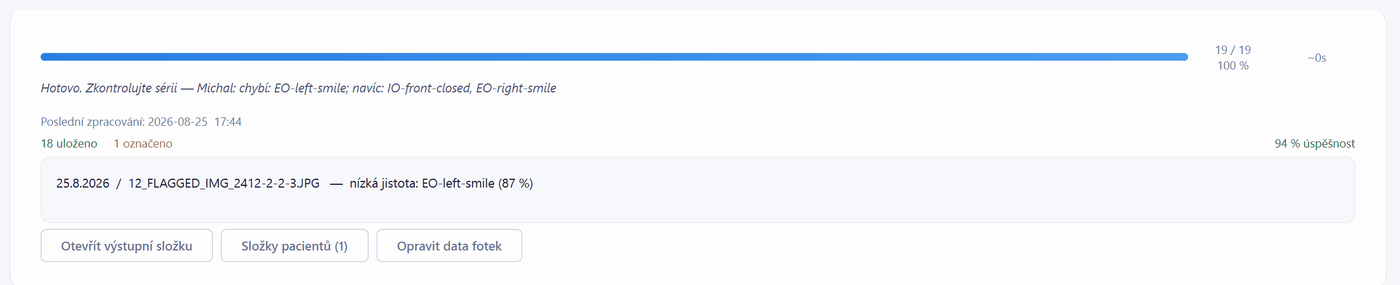
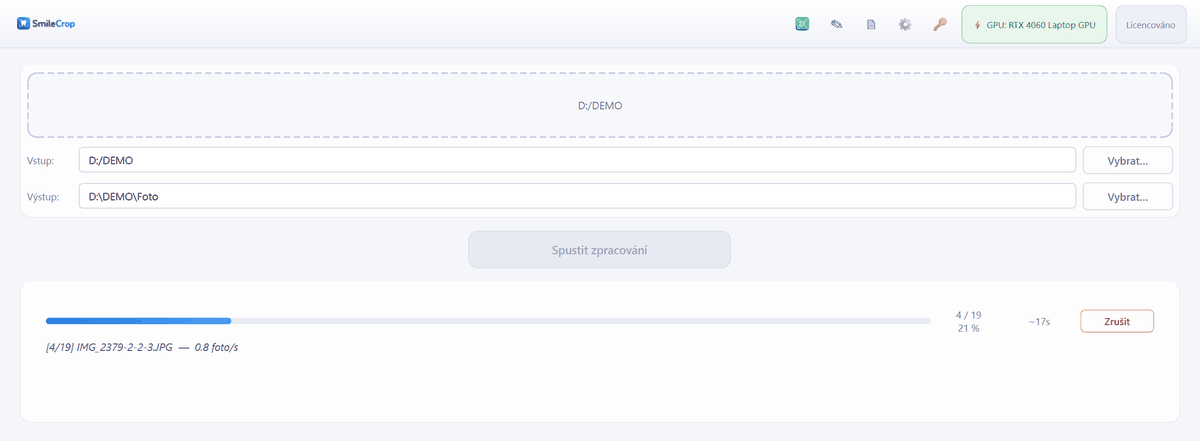
main window mid-run, progress bar and counts

Photo type recognition#

SmileCrop recognises 18 types of dental photograph — intraoral (front in occlusion and open, right, left, upper and lower occlusal, smile), extraoral (en face, right and left profile, 45° obliques, each relaxed and smiling), plus the name tag.

Recognition runs on a trained model inside the application. It sends nothing over the internet and works fully offline.

For each photo the app determines not only the type but also how the subject is rotated within the frame, so the crop lands correctly even on photos taken at an angle.

Where to configure Settings → Photo Types. A type you never shoot can be switched off — those photos are then flagged for review rather than saved.
If it doesn't work a photo below the configured confidence is not saved on a guess — it is flagged. See Flagged photos.

Levelling#

A tilted head or camera is corrected automatically, up to ±8° (adjustable). The photo rotates around the recognised subject rather than the centre of the frame, so the crop does not drift.

Tilts beyond the limit are left alone rather than distorting the photo.

Mirroring#

Photos taken through an intraoral mirror are flipped automatically into the correct orientation — horizontally for lateral views, vertically for occlusals. Nothing to remember.

Crop tightness#

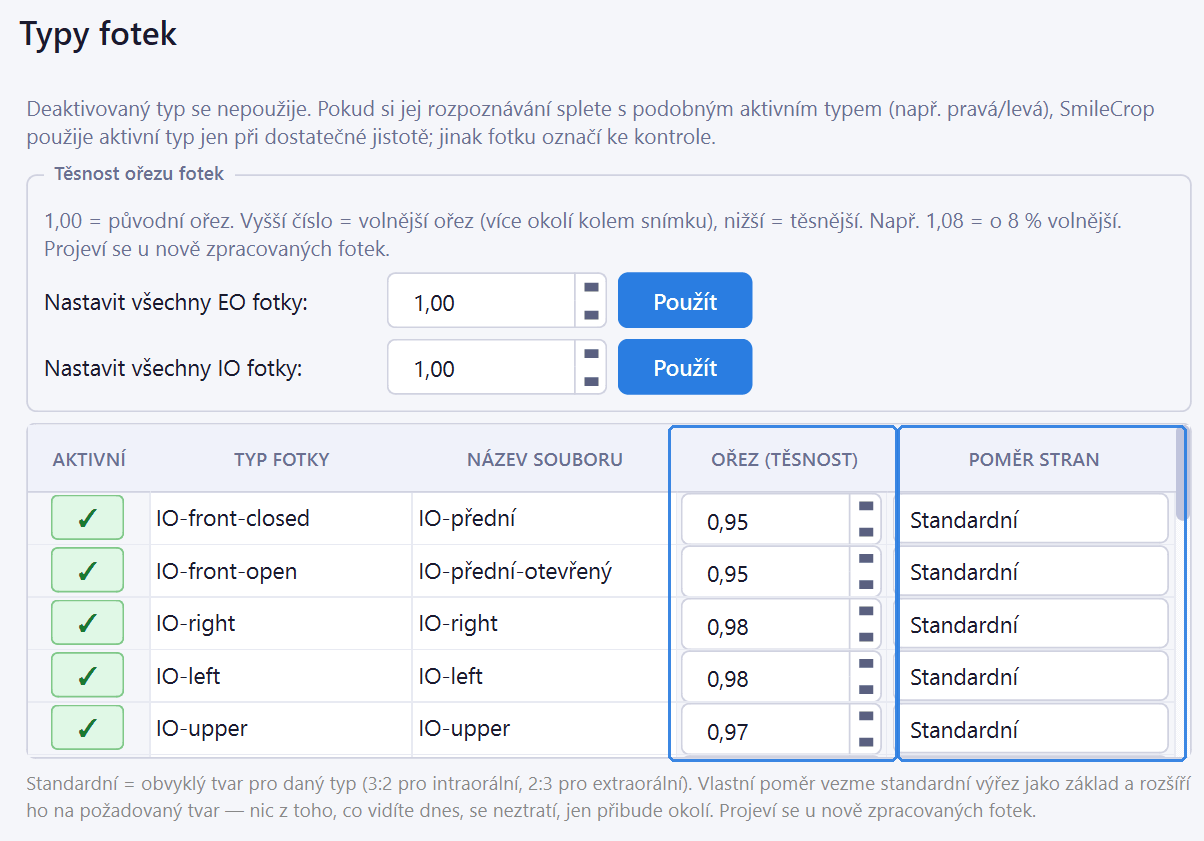
How much surrounding area stays around the subject. 1.00 = the original crop, higher = looser. Set it globally, per group (all IO or all EO in one click), or per individual type.

The defaults are tuned from real clinic use — frontal intraorals are cropped a little tighter than lateral views, for instance.

Aspect ratio

Each photo type can have its own aspect ratio — 3:2, 9:16, 1:1, or a custom value you type. A type left on "Standard" is cropped as before.

A custom ratio takes the standard crop as its guide and widens it to the shape you asked for: nothing in the photo is lost, surroundings are added. Each ratio shows how big the subject may be in the frame for the shape to fit whole.

If it doesn't work the "Custom aspect ratio did not fit" notice appears when the subject fills more of the frame than the chosen shape can carry. Either shoot from farther away, or pick a ratio closer to the standard.
Settings → Photo Types, the Crop and Aspect ratio columns

Back to contents

Patients and folders

QR name tag#

The assistant photographs a QR code carrying the patient's details as the first shot. SmileCrop reads it and files every following photo under that patient — until the next QR code appears.

QR reading is deliberately tolerant: the app tries several magnifications and pre-processing steps, so a less-than-sharp photo still resolves.

If it doesn't work see Manual patient entry. Photos never end up under the wrong patient — until the name tag is certain, they stay untouched in the input folder.
SmileQR — the QR name-tag generator
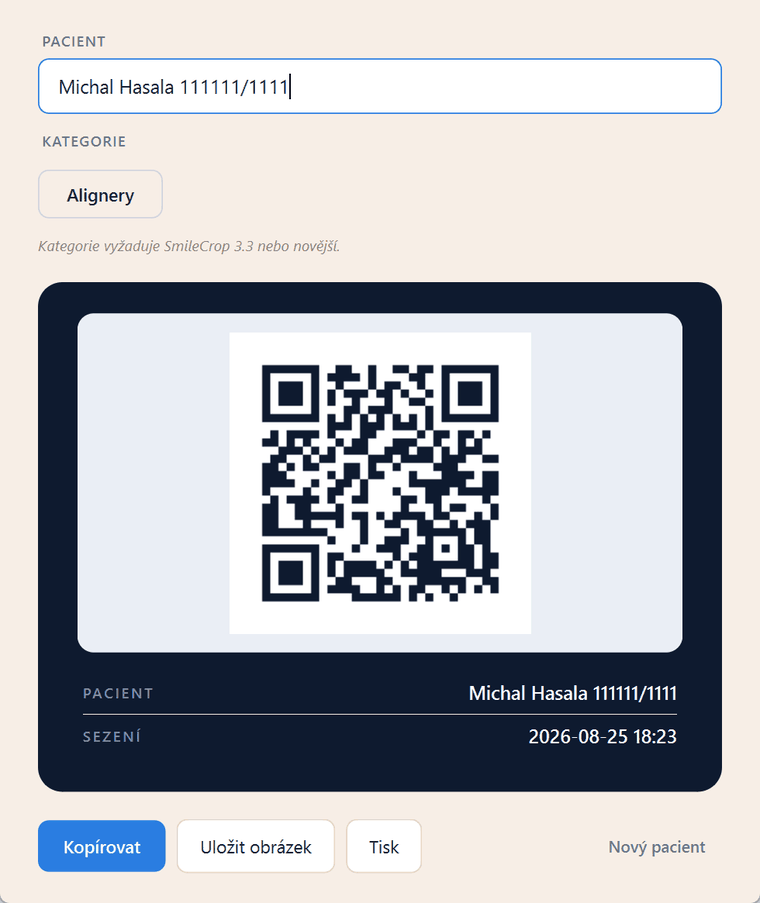
SmileQR showing a generated code

SmileQR#

A separate free application that generates the QR name tags. Enter first name, surname and ID; the code fills the screen and gets photographed.

The code is rendered at whole-number scaling with a generous quiet zone, so it stays readable when photographed off a display.

Birth number to date of birth#

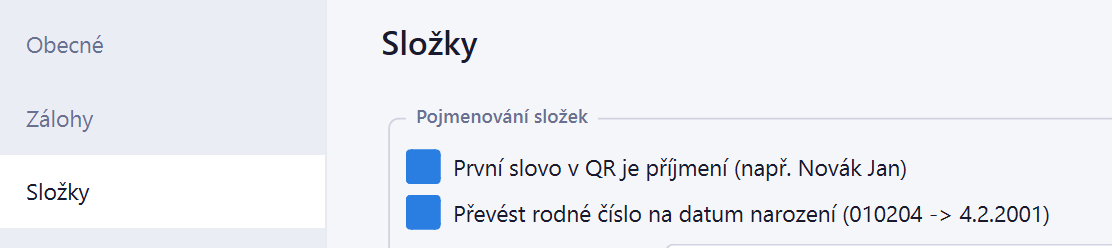
A Czech birth number in the QR code can be converted automatically to a date of birth (0102044.2.2001) and used in the folder name. One checkbox.

The app can also swap the name order if your database exports "Novák Jan" rather than "Jan Novák".

Settings: birth number converted to a date of birth

Patient categories#

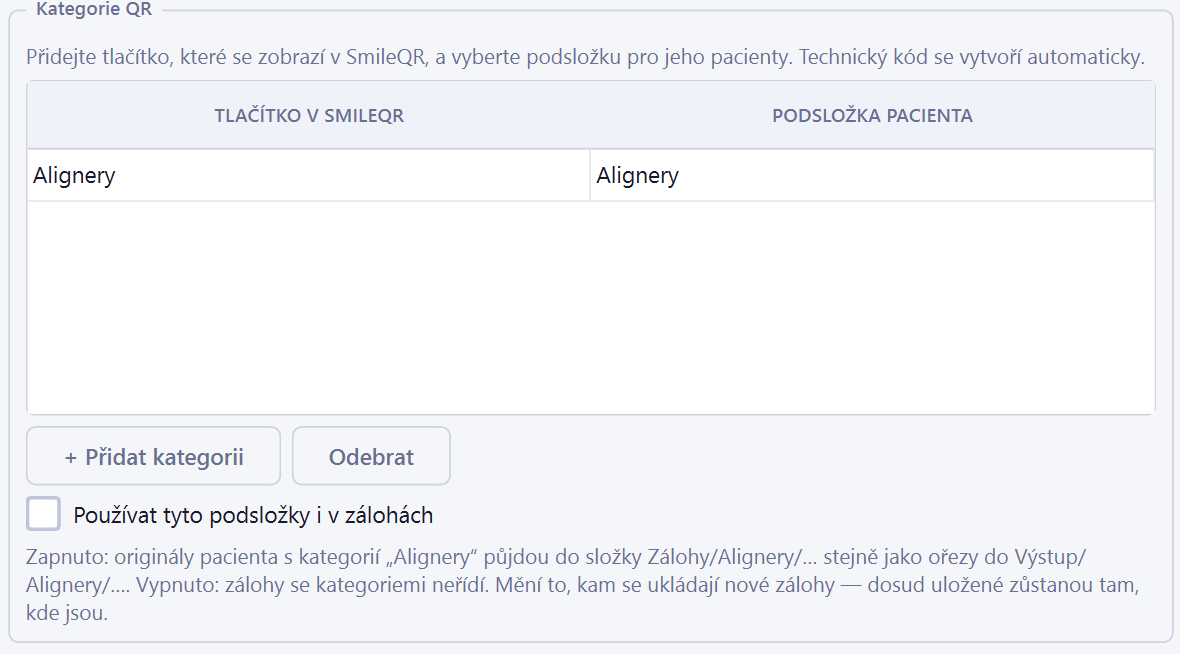
Patients can be split into subfolders by treatment type — aligners, braces, implants. Buttons appear in SmileQR, the assistant picks one, and that patient's photos land in the matching subfolder.

You name the labels yourself; the technical code is generated for you.

SmileQR showing the patient category buttons

Folder names#

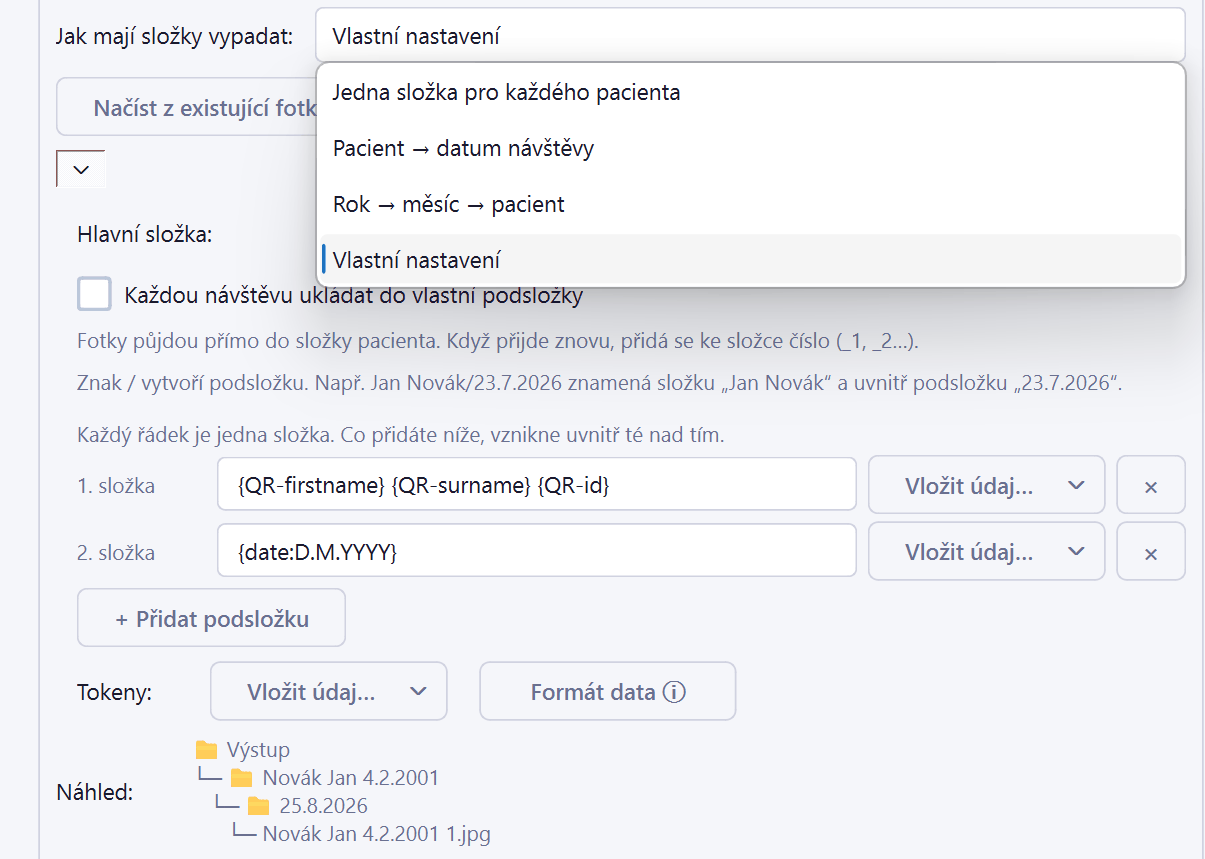
Three ready-made layouts, one click each:

  • One folder per patientJan Novák - 4.2.2001/
  • Patient → visit dateJan Novák/23.7.2026/
  • Year → month → patient2026/July/Jan Novák/

Or your own pattern, assembled from buttons for each field (First name, Surname, Patient ID, Date, Time) — no syntax to memorise. A / creates a subfolder. The preview updates as you build.

Settings → Folders, the name builder with its preview

Photo names#

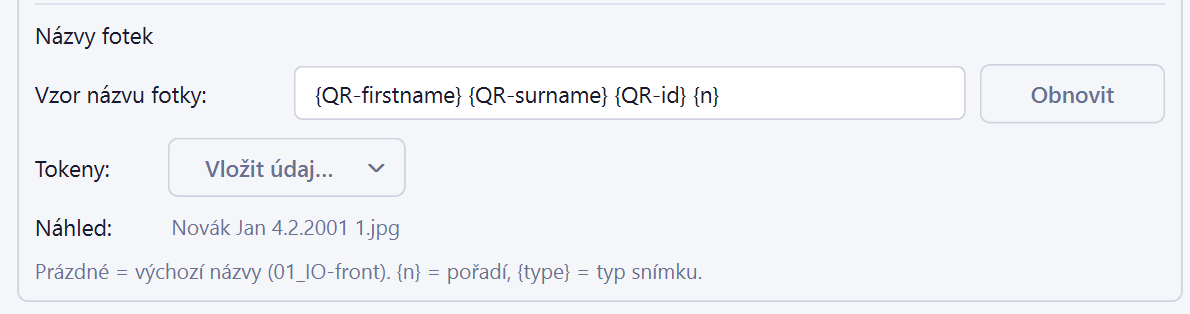
01_IO-front.jpg by default. The pattern uses the same builder — for example Novák Jan 23.7.2026 (3).jpg. Capture-order numbering can be switched off.

Individual type names can be rewritten into your own terminology.

Settings -> Folders: photo name builder with preview

Capture order#

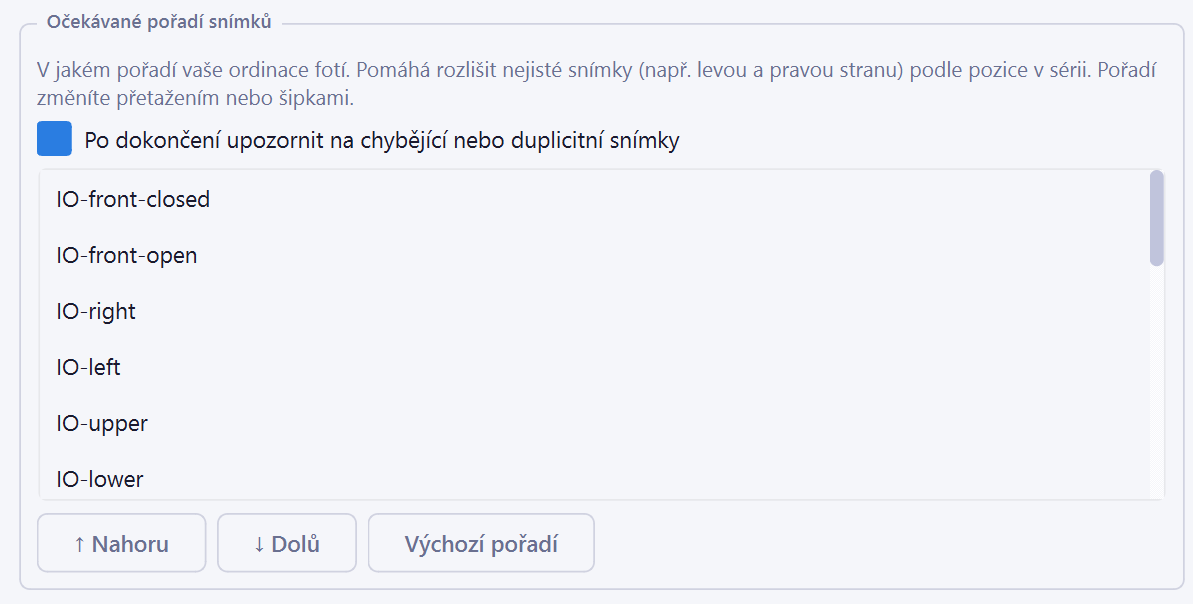
Tell the app the order your clinic shoots in. It is used as a hint when recognition is uncertain — when the model cannot decide between right and left, the position in the series settles it.

Reorder by dragging. The same order drives the contact sheet.

Settings: capture order, drag to reorder

Identity guard#

A small hidden file in each patient folder records that patient's ID. If a different patient with the same name would be written into it, the app refuses to merge and creates a separate folder.

One patient's photos therefore never reach another's folder. Older folders without that file are also kept separate, on the safe side.

Manual patient entry#

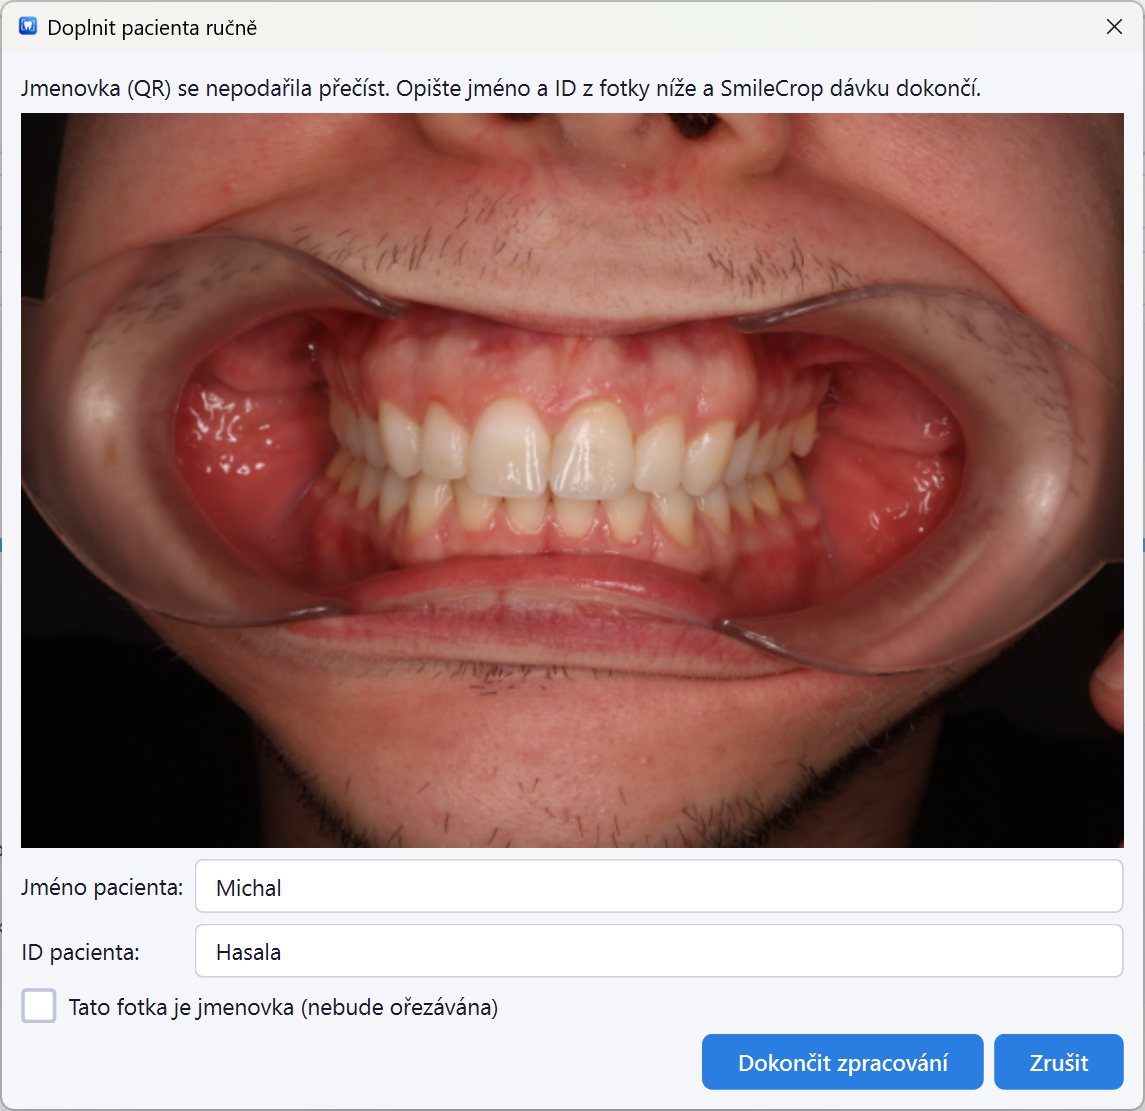
When the QR name tag is unreadable or missing, the photos are neither lost nor misfiled — they stay in the input folder and the app offers to type the name and ID by hand. The batch then finishes normally.

manual entry dialog with the unreadable tag alongside

Back to contents

Quality control

Flagged photos#

A photo the app is unsure about is not saved on a guess — it is flagged for review with the specific reason:

  • no view recognised
  • low confidence: IO-right (61%)
  • disabled type: EO-45L
  • unknown type
  • black borders in IO-upper — bad rotation
  • ambiguous orientation — rotate manually
  • no name tag found for this patient

Flagged photos are listed in the main window after a run; double-click opens one straight in the editor, where you fix and save it.

main window after a run with the flagged list

Processed-patient report#

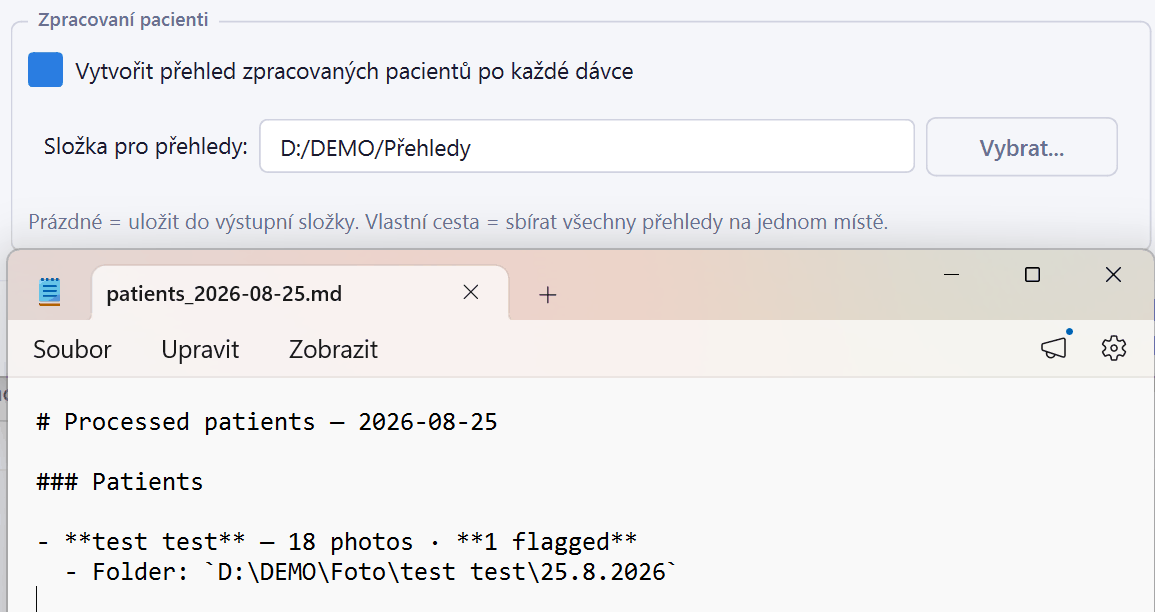
Optionally, each batch produces a readable list of patients with photo counts and folder paths — suitable for an end-of-day check. All reports can be collected in one place.

Processed patient report after a batch

Back to contents

Manual editing

Photo editor#

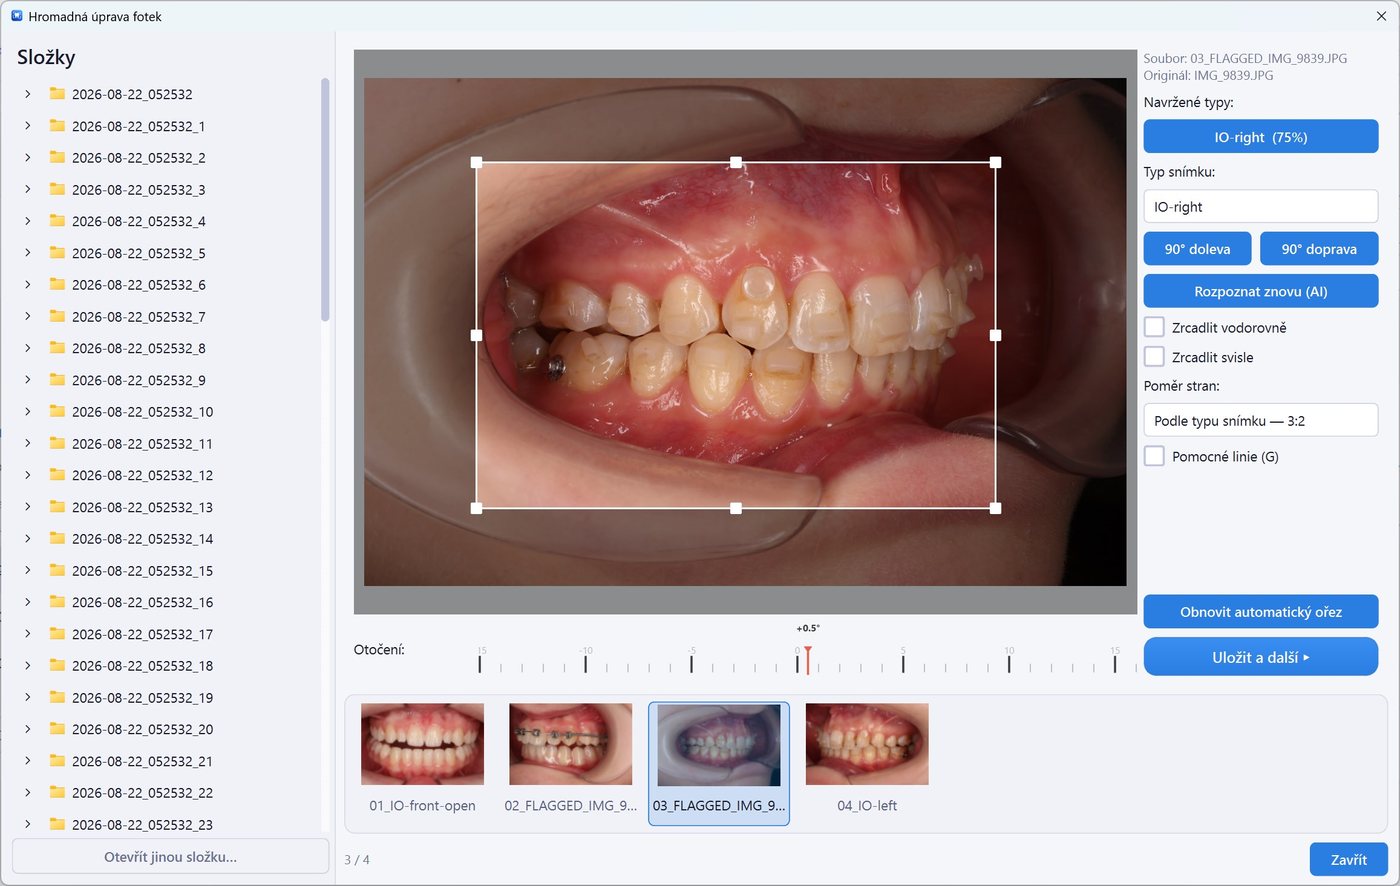
The pencil in the main window. Move and resize the crop, level the tilt, rotate in 90° steps, flip the photo, or change its type — the file is renamed to match. Recognition can be run again.

Non-destructive editing

An output photo is only the result of a calculation from the original plus the stored crop parameters. It can therefore be restored or re-edited at any time — with no quality lost to repeated JPEG saving.

This requires original backup to be on. If the original is missing, the editor says so and offers to find it; you can still work without it, with limitations.

Bulk editor

The same editor, with a folder tree and a filmstrip of thumbnails beside it. Edit a photo, click Save & next, and carry straight on; the following photo is prepared in the background.

editor with the crop rectangle, rotation ruler and folder tree

Alignment guides#

Guides matched to the photo type:

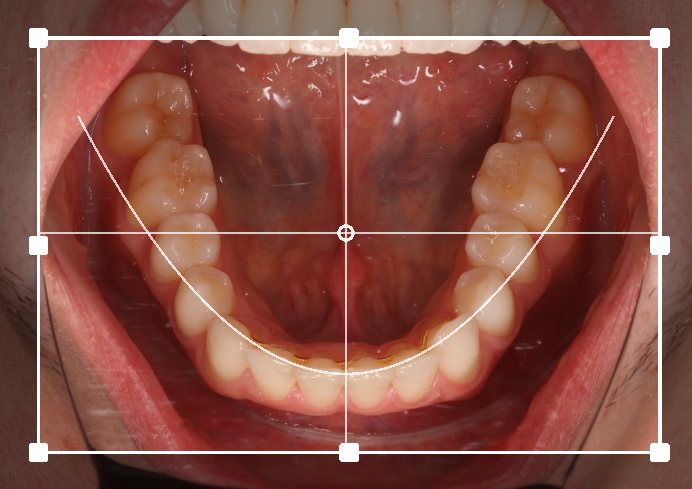
  • upper and lower occlusal — a parabolic arch plus a cross
  • lateral intraoral — a horizontal line only
  • frontal and all extraoral — a cross

The centre of the guides can be dragged — drop it on the pupil line and the horizontal follows.

Guides are off by default and last only for the session. They are an aid while correcting a photo by hand, not a verdict rendered over every automatic crop.

editor with the parabolic arch on an upper occlusal

Rotation ruler#

Below the photo sits a ruler you drag left and right, with the exact value printed directly above the pointer.

The mouse wheel or the [ and ] keys nudge by 0.1°, double-click returns to 0°, and near zero the ruler settles onto level by itself.

Keyboard shortcuts#

KeyAction
H / Vflip horizontally / vertically
Galignment guides
[ / ]tilt by 0.1°
L / Rre-label as left / right
Ctrl+Entersave

Back to contents

Output

Contact sheet#

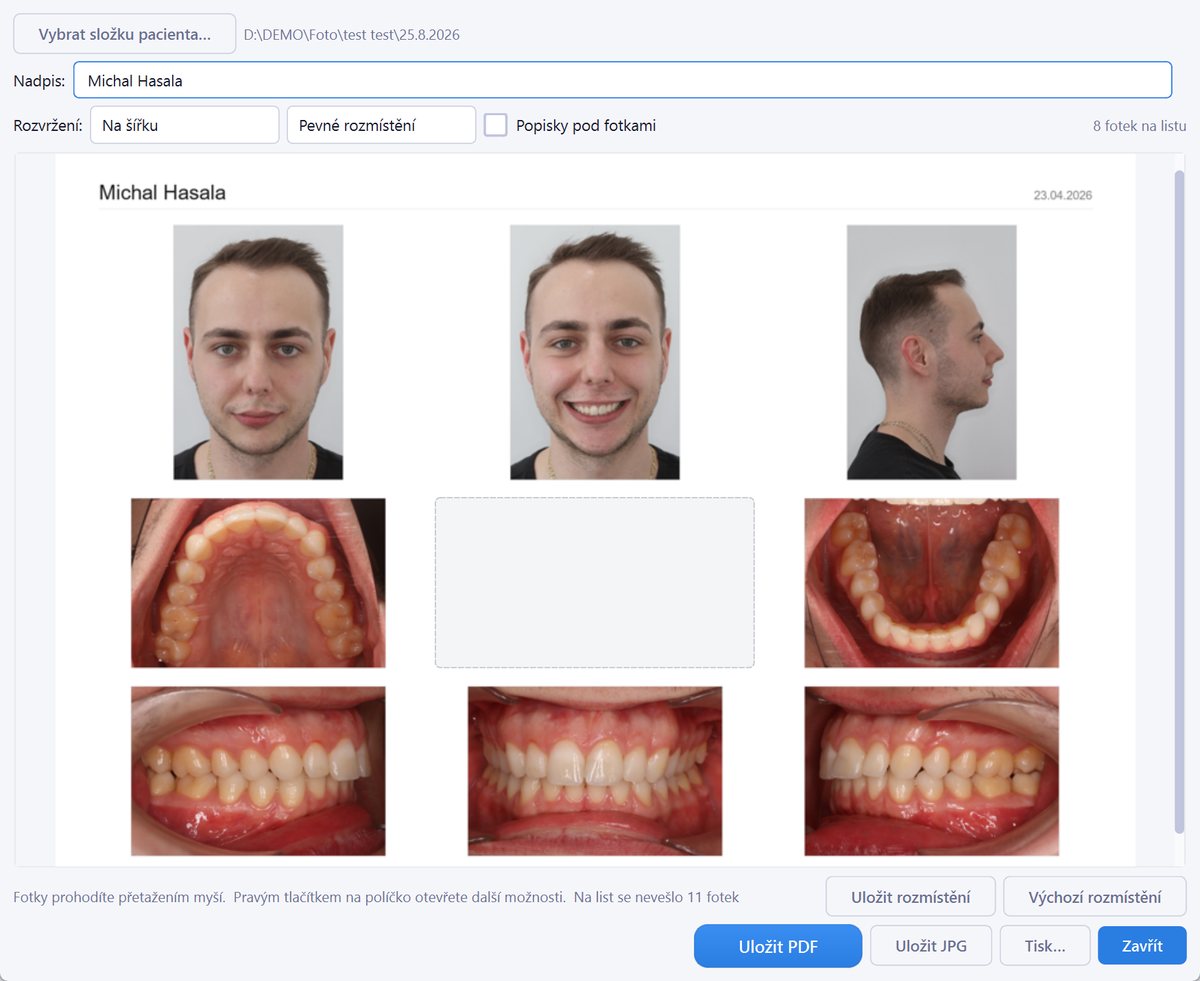
The button next to the pencil. Pick a patient folder and get all their photos on a single A4 page — save as PDF, save as JPG, or print it directly.

Photos are ordered by your shooting order, not by filename. Portrait shots fit inside their cell whole; they are never distorted.

contact sheet with a complete patient series

Back to contents

Automation

Watched folders and SD cards#

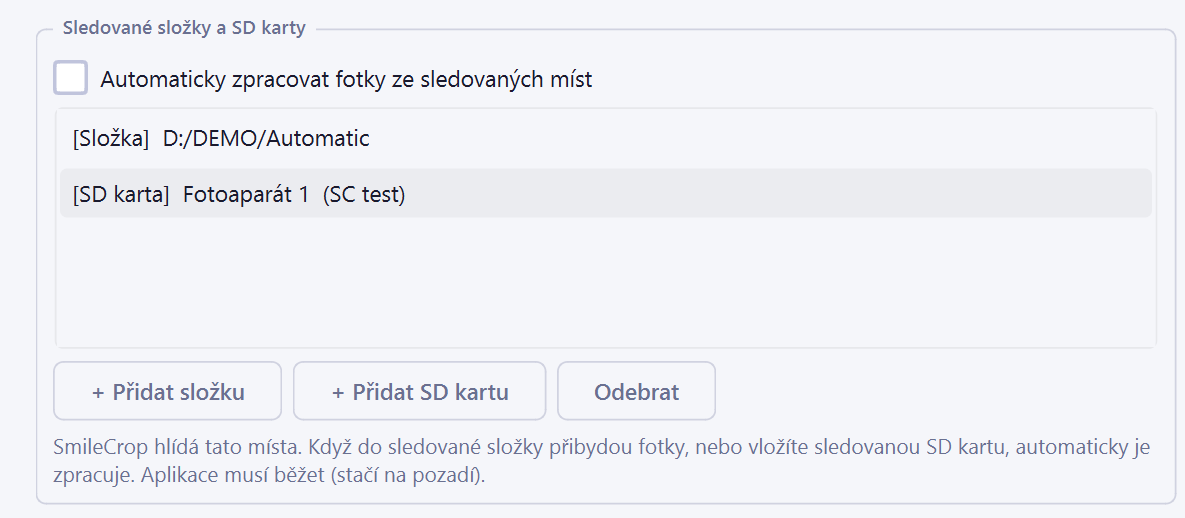
Insert the card and the photos process themselves, without a single click. A folder on disk or on the network can be watched the same way.

The app remembers a card by its volume serial number, so it recognises it under any drive letter. By default it reads the whole card; in the wizard you can pick a single folder on it, if the card also carries other files. The choice is stored relative to the card, so it survives a change of drive letter.

If it doesn't work watched folders need original backup enabled — a folder does not empty itself, so the same photos would be processed over and over. The app says so. SD cards do not need it: with backup on the originals are moved off the card, and with backup off the app remembers which files each card has already been through, so a later insertion picks up only what is new.

If you picked a folder on the card and it is no longer there (after a reformat, say), the app does nothing — it deliberately will not fall back to sweeping the rest of the card.

Settings → Automation, the list of watched places

Scheduled runs#

Process at fixed times (12:00 and 18:00, say). The app must be running; the background is enough.

Start with Windows#

The app starts itself after you log in.

Running in the background

Closing the window need not quit the program — it can stay in the notification area and keep watching. When a batch finishes, a system notification reports the counts.

Back to contents

Data and safety

Original backup#

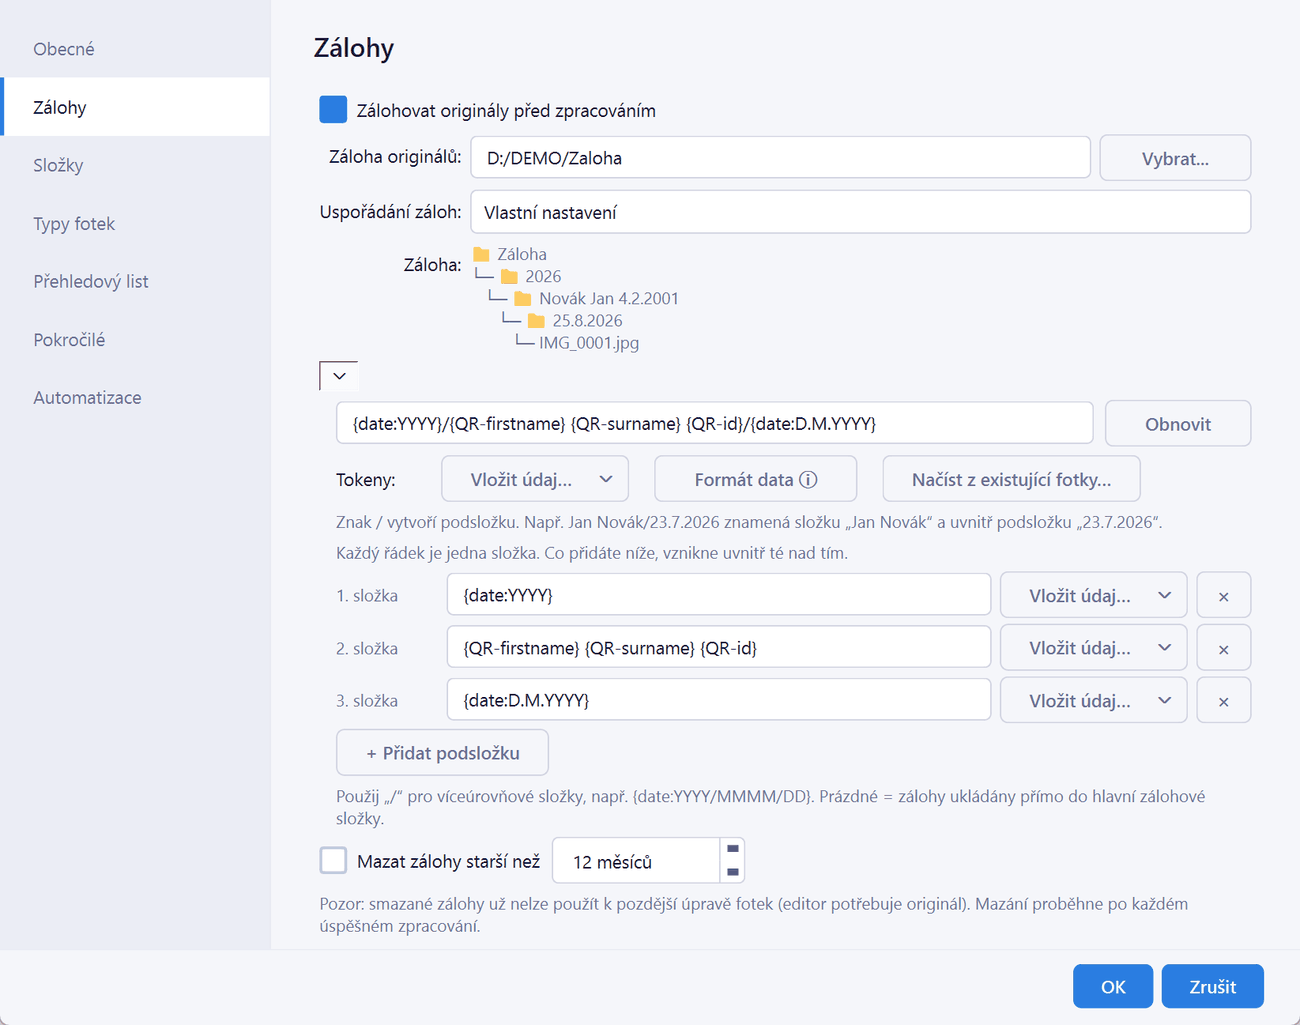
Originals are moved to a backup folder before processing. The backup layout is up to you — everything in one folder, year → month → day, or by patient.

Backup is what makes later editing possible. Backups older than a chosen number of months can be deleted automatically — the app states explicitly that deleted originals can no longer be used for editing.

Settings -> Backup: backup folder structure

Photo date protection#

Cropped photos keep their original capture date, so they stay correctly sorted in viewers and record systems. If a date is lost somewhere anyway, the app can repair it from its own records — on a button, or automatically at startup.

All-or-nothing saving#

Saving an edit is all or nothing. If anything fails — typically a network drive dropping out — the original photo and its parameters are both left untouched. A photo that disagrees with its own stored parameters cannot occur.

When a save does fail, the app offers Try again / Continue without saving / Back to editing. The editing window can never be stuck.

Disk space watch#

The app tracks free space on the backup drive and warns before backups start failing.

Duplicate folders#

When a patient or visit folder already exists, you choose add a number (keeping visits separate) or merge into the existing one. Merging never overrides the identity guard.

Back to contents

Running it

Guided setup#

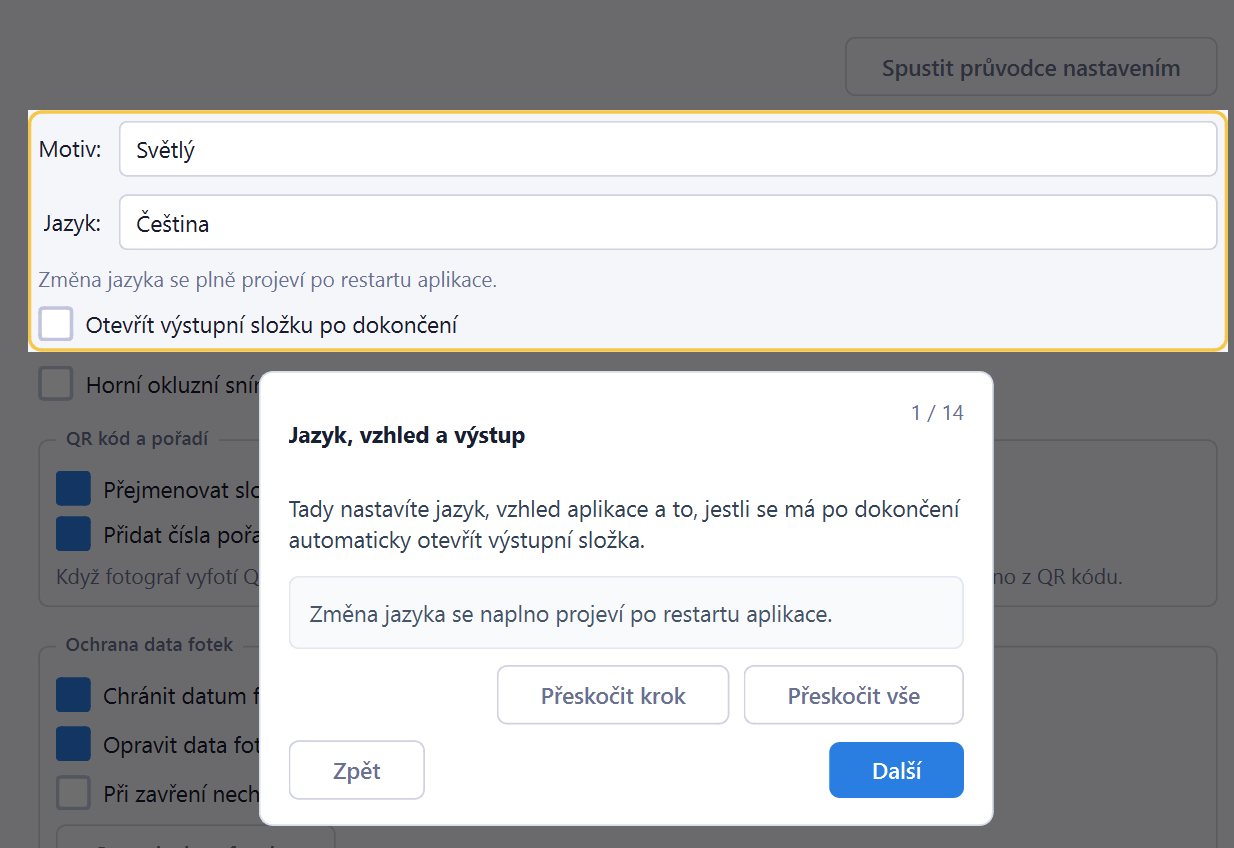
On first launch a guide walks you through setup step by step — where to save, whether to back up, how to name folders and how you shoot. It works like an in-game tutorial: one thing at a time, explained where it matters, with your progress visible. Everything else has sensible defaults, and the guide can be re-run at any time.

first step of the guided setup

Diagnostics#

One click builds a diagnostic package for support. It contains no photos and no patient data, and you see exactly what is in it before it is saved.

If the app did not shut down cleanly last time, it offers the package itself on the next launch.

Updates#

A new version is announced in the window. In the Microsoft Store build, the Store handles updates.

Licence and trial#

A 14-day trial with no feature restrictions. After it expires the app keeps running with a daily photo limit. A licence is activated with a key inside the app.

Language and theme#

Czech and English; light and dark themes.

Back to contents

Technical details

SystemWindows 10 and 11
InstallationMicrosoft Store, or a classic installer
Internetneeded only to verify the trial and for updates — processing runs offline
PhotosJPG
Recognised types19
Default outputIO 2400 × 1600, IO-smile 2400 × 1200, EO 1600 × 2400 px
Levellingup to ±8° (adjustable)
GPUused when available, otherwise runs on the processor
Patient datastays on your computer; nothing is uploaded

What SmileCrop deliberately does not do

The list of what we turned down is often more honest than the list of features: