
Watched Folder and SD Card: From Setup to a Clear Workflow
Photographing patients does not involve work only at the chair. The images need to be transferred, named correctly, and stored where the team can easily find them later. A well-prepared procedure reduces improvisation and helps maintain a consistent way of working throughout the practice.
At the beginning, you set up an input folder or card, an output folder, and a naming template.
The input determines where the photographs come from
The input can be a folder into which you copy the photographs or a connected SD card. For the assistant, it is important to choose a location that matches the practice's usual operations. If the images are transferred directly from the camera, it makes sense to prepare a procedure centered around the card. If the team first copies them to a work computer, a permanent input folder may be more practical.
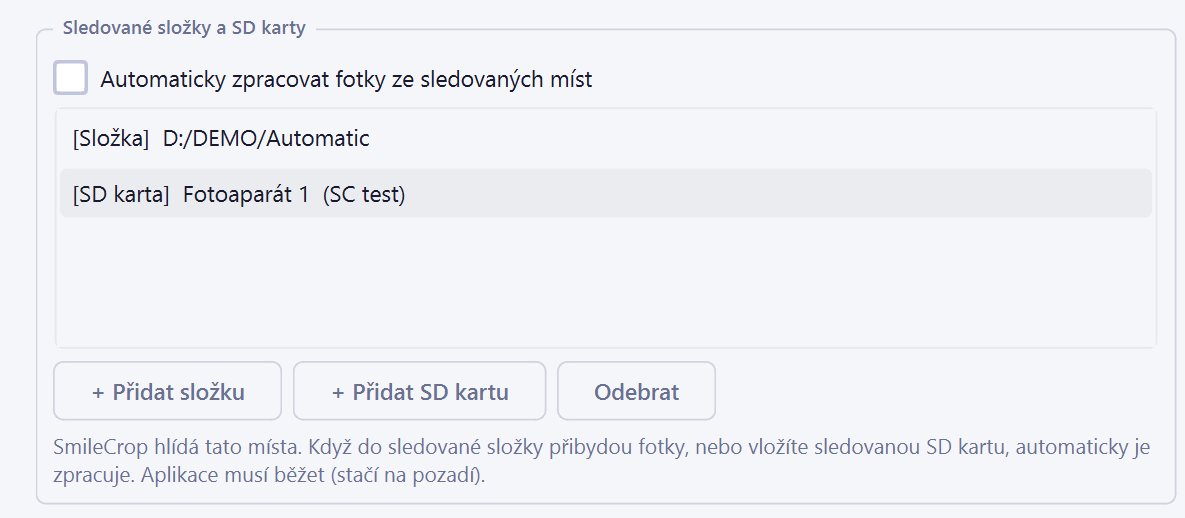
Document the chosen procedure in the internal guide. Everyone who takes over the photographs will then know where to connect the card or into which folder to place the files. This reduces the risk that some images will remain on the card, on the desktop, or in a temporary directory.
The output must correspond to the practice's work
The output folder is the place where you want the prepared photographs to be after the workflow is completed. Choose it according to where you subsequently open the images and how you transfer them into the patient's documentation.
Before introducing the procedure, verify access permissions, the backup method, and the practice's rules for storing medical documentation. It is also practical to determine who handles a situation in which the destination folder is unavailable or the patient was selected incorrectly.
A naming template replaces decision-making during routine work
The naming template determines how the files will be named. It should follow the system that the practice already uses while also making it possible to distinguish patients and individual image series safely.
When designing the template, ask yourself simple questions: what you use to search for an image, which details must be visible in the name, and which details, conversely, do not belong in the name. Test the resulting format on a practice set and check how the files are sorted both in the folder and in the documentation being used.
A checkpoint remains part of the work
Low-confidence images are flagged for review, and a person reviews them.
Therefore, include the review in the standard handover procedure. The assistant can verify the patient assignment, resulting names, destination, and completeness of the series before the photographs are used in the documentation or in communication with the doctor.
What to prepare before going live
Write down a brief operational scenario from removing the card from the camera through to the final review. It should include the input location, the rule for selecting the patient, the destination folder, the file name format, and responsibility for the review.
Also test less common situations: an incomplete series, repeated photography, files inserted by mistake, or an unavailable output. The goal is not to eliminate human review, but to give the team a clear procedure for identifying and correcting an error.
You can find a more detailed description of the workflow on the processing photographs from an SD card page.
Good initial setup primarily saves the small decisions that would otherwise be repeated with every photograph transfer. The assistant does not have to search for the destination folder, devise the name format, or determine where the images should be retrieved from each time. She retains a clearly defined review of the result and the handover of the photographs to the next part of the practice's operations.